Prabhu Sunderaraman

Fullstack Engineer, Programmer, Writer, Trainer

prabhu.bits@gmail.com,     GitHub     Youtube     LinkedIn
  • Home
  • Profile
  • Books
  • Reading List
Browsing: / Home
Shortlink

Play with Play – III

By Prabhu Sunderaraman on June 21, 2015 in Play, Scala

I want to build a simple utility application to track my travel expenses. All I need is a web application where I can feed details of my expenses and store them in a database. I can then generate a report and mail it to the Accounts department. I also want comparison charts, to analyze my expenses over a period of time and take actions accordingly. I have decided to build this using Play framework with Scala, moving away from the servlet-based web development. In this article, I will discuss the database access mechanism.

Initial database design

We’ll use MySQL database. Let’s take baby steps. We’ll create a schema, say expenses. To begin with we may need a table to store all the events. Each event will have a set of expense items. For example, Scala conference in Bangalore from July 1 to July 4 is an event. The expenses associated with this event will be fed into the database. We’ll worry about storing the expenses later. Let’s create a table called event that will store all the events. The event table will have id, name, description, start_date and end_date columns as shown in Figure 1.0.

01
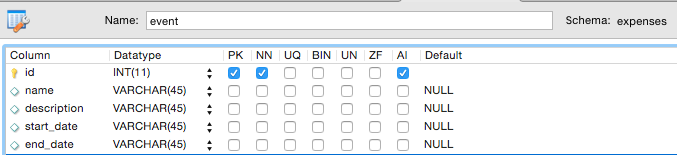
Figure 1.0: event table

We’ll insert a sample record in the event table using the following query.
INSERT INTO expenses.event(name,description,start_date,end_date) VALUES(“GIDS”,”GIDS 2015″,”2015-04-22″,”2015-04-25″);
Alright, we have the basic design ready. Let’s move on to the Play area.

Getting started

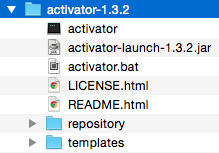
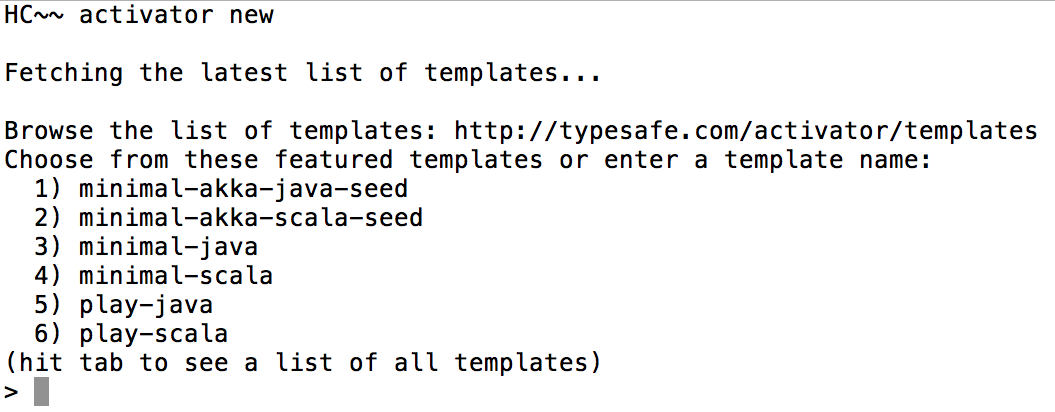
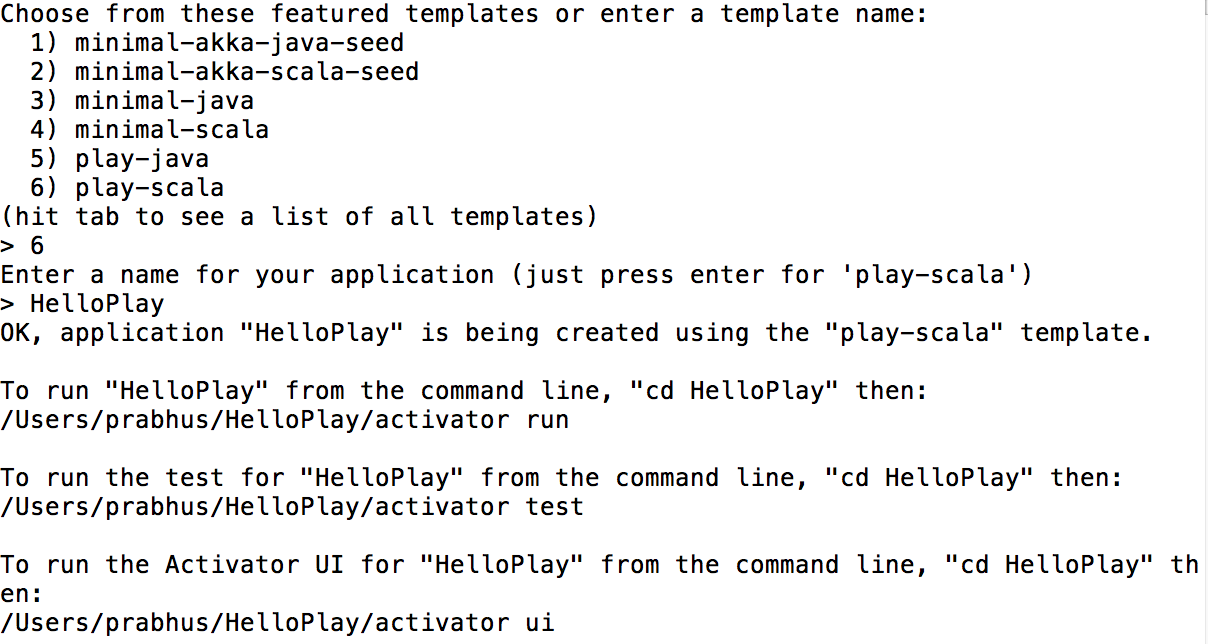
Let’s create a Play application, ExpensesApp using activator new from the command prompt. The skeleton is generated with folders like controllers and views and some sample scala files. In the conf folder we have the application.conf file where we will configure the database details as shown below.

# Database configuration
# ~~~~~
# You can declare as many datasources as you want.
# By convention, the default datasource is named `default`
#
db.default.driver=com.mysql.jdbc.Driver
db.default.url=”jdbc:mysql://localhost/expenses”
db.default.user=root
db.default.password=”*******”

Before we start writing database access code, let’s find out the options to do that.

Database access mechanisms

There are a couple of ways by which you can access the database in Scala; Anorm and squeryl. Of course, there is our JDBC too.

  • Anorm: Anorm stands for Anorm is not an ORM. We write SQL queries and map them explictly to the models ie., the Scala classes. The queries are still the normal SQL queries that we need to write and map the results to the models.
  • Squeryl: Squeryl is the ORM for Scala. You define the classes and map them with the tables. Squeryl provides its own DSL syntax for writing queries.

We may have to configure the build.sbt file to include the libraries based on the access mechanism we choose. In this article we’ll deal with anorm. So, here’s how the build.sbt file will look like.

name := “””ExpensesApp”””

version := “1.0-SNAPSHOT”

lazy val root = (project in file(“.”)).enablePlugins(PlayScala)

scalaVersion := “2.11.6”

libraryDependencies ++= Seq(
jdbc,
anorm,
cache,
ws,
“mysql” % “mysql-connector-java” % “5.1.27”
)

Access using Anorm

We have the event table and we would like to play with its data. Let’s create a model class called Event and write the Anorm code. In the app folder along with controllers and views, let’s create a models folder. The models folder will haveEvent.scala file as shown in Figure 2.0.

02
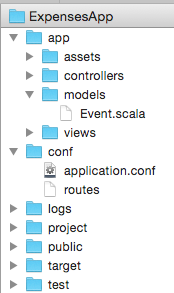
Figure 2.0: app folder

Let’s define a case class Event as shown below.

package models  

import java.util.{Date}  

case class Event( 	
   name:String, 	
   description:String, 	
   start:Date, 	
   end:Date )

The Event class contains the fields that correspond to the columns in the table. This class will be used for all the CRUD operations that we will perform against the event table. Let’s define an Event object and here is where we’ll use Anorm API. To begin with let’s retrieve all the records from the events table. The Event.scala file with the Event object and case class is shown below.

package models  

import java.util.{Date} 
import java.text.SimpleDateFormat 
import anorm.SQL 
import anorm.SqlQuery  
import play.api.Play.current 
import play.api.db.DB  

case class Event( 	
 name:String, 	
 description:String, 	
 start:Date, 	
 end:Date )  

object Event{ 	
  val selectQuery : SqlQuery = SQL("select * from event")  
  def listAll = { 		
     DB.withConnection { 			
        implicit connection => 			   
           selectQuery().map {row => 				   
             Event(row[String]("name"), 				
               row[String]("description"), 				
               new SimpleDateFormat("yyyy-MM-dd").parse(row[String]("start_date")), 			
               new SimpleDateFormat("yyyy-MM-dd").parse(row[String]("end_date"))) 	
		}.toList 		
     } 	
  } 
}

The Event object has a selectQuery variable that defines the SQL select query. The listAll method gets the connection from the DB and executes the selectQuery. The result is mapped to the Event case class instance and finally we get a list of Event instances. Pretty concise, isn’t it?
Let’s write an addEvent method with an insert operation as shown below.

val insertQuery : SqlQuery = SQL("""insert into 	
event(name,description,start_date,end_date) 	
values({name},{description},{start},{end}) 
 """)  

def addEvent(event:Event) = { 	
    DB.withConnection { 		
      implicit connection => 		
      insertQuery.on( 			
      "name" -> event.name, 			
      "description" -> event.description, 			
      "start" -> event.start, 			
       "end" -> event.end ).executeUpdate 	
    } 
}

We use the executeUpdate method on the query instance. Similarly we can also define the delete and update queries.
Now, it’s time to create a Controller and wire up the database code.

Controller

Let’s define a new controller class EventsController. The controller class will have action methods to add and list all events. As we already have a record in the event table, we’ll define a listAllEvents method as shown below.

package controllers  

import play.api._ 
import play.api.mvc._ 
import models.Event 
import java.util.Date 
import java.text.SimpleDateFormat  

object EventsController extends Controller{  	
  def listAllEvents = Action{ 		
    def events = Event.listAll 	
    Ok(views.html.events.list(events)) 	
  } 
}

The listAllEvents method invokes the listAll method of Event object and executes the select query. The returned list ofEvent instances are passed to a view page for display. The view page views/events/list.scala.html has a simple loop like this.

@(events:List[Event]) 

@main("List of Events"){  
  <h3>List of events</h3> 
  <ul> 	
  @for(event <- events){ 		
    <li>@event.name, @event.description, 
        @event.start, @event.end
    </li> 	
   } 
  </ul> 
}

And finally we have the routes configuration. We’ll add the URL mapping for the listAllEvents method in the routes.conf.

GET /events controllers.EventsController.listAllEvents
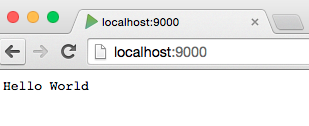
Time to start our server and run the URL, http://localhost:9000/events/. We’ll get the output as shown in Figure 3.0.

03
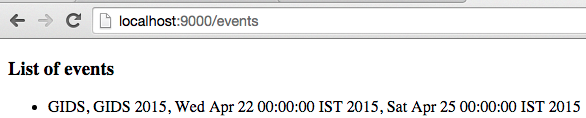
Figure 3.0:List of all events

Let’s define addEvent method in the EventsController class as shown below.

def addEvent(name:String,
    description:String,
    start:String,
    end:String) = Action{ 	
    val startDate = new SimpleDateFormat("yyyy-MM-dd").parse(start) 	
    val endDate = new SimpleDateFormat("yyyy-MM-dd").parse(end) 	
    val eventInstance = new Event(name,description,startDate,endDate)    
    Event.addEvent(eventInstance) 	
    Ok("Event added successfully") 
}

We can bring forms and binding of form values in the controller, but I’m going to write about it as a separate article. We’ll add the URL mapping for the addEvent method in the routes.conf file.
POST /events/add controllers.EventsController.addEvent(name:String,description:String,start:String,end:String)
As we don’t have a form, let’s use the Postman client to send a POST request to addEvent method as shown in Figure 4.0.
04
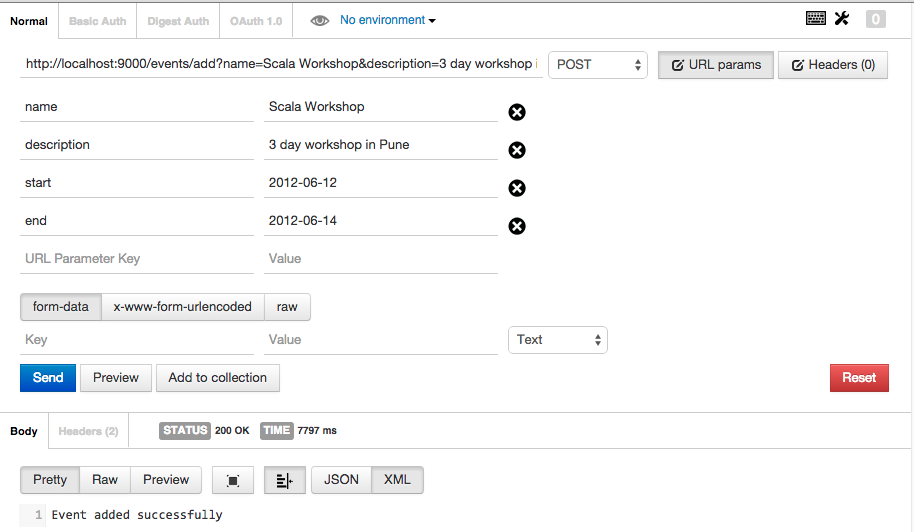
Figure 4.0:Postman client for adding event

Note:
Postman is a REST client available as a chrome extension. To quote their description, ” Postman helps you be more efficient while working with APIs. Postman is a scratch-your-own-itch project. The need for it arose while one of the developers was creating an API for his project. After looking around for a number of tools, nothing felt just right. The primary features added initially were a history of sent requests and collections. …”*

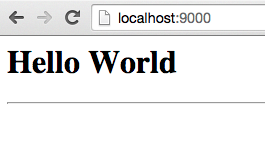
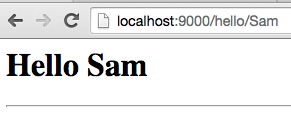
Running the list of events URL will give you the result as shown in Figure 5.0.
05
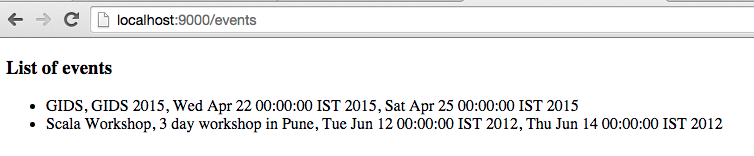
Figure 5.0:List of all events

Share this on: Mixx Delicious Digg Facebook Twitter
Shortlink

Play with Play – II

By Prabhu Sunderaraman on May 29, 2015 in Play, Scala

In the previous post I discussed the need for a non-servlet based web development environment and introduced you to the Play framework. In this post, we’ll get started with Play and churn out some code.

Get started with Play

Typesafe gives us a reactive platform, Activator, for building Play applications. The platform helps you to create, build, test and deploy Play applications. In fact, it’s not only used for Play applications, but also for Scala, Akka or Java applications.
You can download Activator from https://typesafe.com/get-started. Installing activator gives you the set of files as shown in Figure 1.0.

04
Figure 1.0:Activator directory

You can add the activator-1.3.2 folder to the environment path. Open your Terminal or comand-prompt and enter activator new to create new projects. This command usually downloads a number of artifacts from the Maven repository. It will then, prompt your for creating new projects as shown in Figure 2.0.


05
Figure 2.0:activator new

As you notice in figure 2.0, there are different type of projects you can create in the platform. Let’s choose the 6th option, ie., play-scala and enter the project name as ‘HelloPlay’ as shown in figure 3.0.
06
Figure 3.0:Creating HelloPlay project

A directory HelloPlay is created with all the basic set of files and folders in it as shown in figure 4.0. Creating a Play project for the first time in your machine, may be a time consuming task depending on the internet speed, as a large number of dependent libraries are loaded from the Maven repository.
07
Figure 4.0:HelloPlay directory

The listing below gives you the description of the important files in our HelloPlay project.

  • [app]- Contains the controllers, models and views. In other words it contains our application logic.
  • build.sbt- The project build file. Here’s where we configure dependencies and other stuff.
  • [conf]- The project configuration file application.conf and the routes configuration files are present.
  • [public]- The JS, CSS and resources like the images are stored here.
  • [test]- Contains the specs

Now, it’s time to run our application. Play framework comes with an embedded Netty server. Navigate to HelloPlay folder and enter activator run as shown in figure 5.0.
08
Figure 5.0:HelloPlay directory

The Netty server is started and running in port 9000 by default. You can launch your application from http://localhost:9000 to get the output shown in Figure 6.0.
09
Figure 6.0:Running HelloPlay

Let’s tweak HelloPlay

I am not going to dwelve deep into the code in this article. But the first lesson of learning anything new framework is incomplete, without the ‘Hello World‘. So let’s tweak our HelloPlay a little bit to display ‘Hello World’. In the app/controllers/Application.scala’ file, we have the Application controller class defined with an index method. The current default code looks as shown below.

package controllers  

import play.api._ 
import play.api.mvc._  

object Application extends Controller {    
   def index = Action {     
     Ok(views.html.index("Your new application is ready."))   
   }  
}

The index method returns an Action. Action is a function that takes in an implicit request and returns a Result. Let’s create another method sayHello that prints Hello World as shown below.

... 

object Application extends Controller {    
  def sayHello = Action {   	
    Ok("Hello World")   
  }    

  def index = Action {     ...   }  
}

The sayHello() method returns Ok(“Hello World”) that returns a result with plain text as output. Now how do we map http://localhost:9000 to sayHello() method? We have the routes. In the conf folder the routes has the mapping of requests with controller/actions. Currently you will notice the following mapping.

 
#Home page
GET / controllers.Application.index

It’s pretty self-explanatory. Let’s comment this line and map / with controllers.Application.sayHello like this.

 
#Home page
#GET / controllers.Application.index
GET / controllers.Application.sayHello

Refreshing http://localhost:9000 in the browser will automatically recompile the files and produce the output as shown in figure 7.0.

10
Figure 7.0:Hello World

Instead of displaying ‘Hello World’ text, let’s create a view that will have the output. In the app/views folder you’ll notice some .scala.html files. Let’s ignore them for now and create a new file, say hello.scala.html with the following code.

<html> 	
  <head> 		
    <title>Hello World</title> 	
  </head> 	
  <body> 		
    <h1>Hello World</h1> 		
    <hr/> 	
  </body> 
</html>

Now, when you send a request to http://localhost:9000, show the above html file as a result. So, we modify the sayHello() method like this.

object Application extends Controller {    
  def sayHello = Action {   	
    Ok(views.html.hello())   
  } 
}

The views.html.hello() method invokes the hello.scala.html file. Internally the hello.scala.html file is compiled to a Scala object. For the adventurous, you can find these .class files in target/scala-2.11/classes/views/html folder. Refreshing http://localhost:9000 will give you the output as shown in figure 8.0.

11
Figure 8.0. Output with the html file

We’ve come this far! Let’s stretch it a bit more. We’ll pass a parameter say name to the sayHello method and display Hello . I mentioned earlier that Play framework supports RESTful style URLs. So, when you enter http://localhost:9000/hello/Sam we want the output to be Hello Sam. There are three items that needs to be modified for achieving this; the action method, the view and the routes configuration. Let’s modify the sayHello() method as shown below.

object Application extends Controller {    
  def sayHello(name:String) = Action {
 	Ok(views.html.hello(s"Hello $name"))   
  } 
}

In the code above, the request parameters can be accepted as method arguments. The sayHello() method has the name parameter as an argument. We pass the message s(“Hello $name”) to the view file. Let’s modify our hello.scala.html file as shown below.

@(msg:String) 

<html> 	
  <head> 		
    <title>Hello World</title> 	
  </head> 	
  <body> 		
    <h1>@msg</h1> 		
    <hr/> 	
  </body> 
</html>

Notice the special syntax @msg in the html file. We declare the @msg variable at the top and access it inside the <h1> element. The @msg variable holds the information that’s passed during runtime.
And finally, we modify the routes to accomodate the new URL style as shown below.
GET /hello/:name controllers.Application.sayHello(name)
Pretty cool, isn’t? Running http://localhost:9000/hello/Sam will give you the output as shown in figure 9.0.

12
Figure 9.0. RESTful style

Play vs. Node.JS

In the beginning, when I was working with Play framework, only one point kept crossing my mind. Oh, this looks a lot similar to Node.JS with Express. And boy, I was right. There is lot of debate going on between the two. And there’s a popular slideshare presentation comparing the two, by Yevgenly Brikman of LinkedIn. The presentation compares Play and Node.JS in detail, which I feel is a good source of information when you are architecting an application. You can view the presentation at http://www.slideshare.net/brikis98/nodejs-vs-play-framework?qid=d6c0b0da-bd29-4be4-93e2-ae0dadaea769&v=default&b=&from_search=1.

Share this on: Mixx Delicious Digg Facebook Twitter
Shortlink

Play with Play – Part I

By Prabhu Sunderaraman on May 24, 2015 in Play, Scala

Play is a very interesting web framework on the block. It’s interesting because it moves away from the traditional servlet-based web applications running on the JVM. It’s very interesting because it can be built using Scala and Java. In the first of the part of the series of articles on Play, I introduce you to Play framework, its architecture, the core building blocks and create a HelloWorld application using the Scala language.

Web applications with Servlets

Let me jog your memories about web development in Java. We create a servlets/JSPs and surround it with beans, configuration files etc. The servlets are deployed in a container. When you send a request to the servlet, the instance processes the request and gives you a response. Each request creates a thread that acts upon the servlet instance as shown in Figure 1.0.
01

Figure 1.0: Servlet, Thread-per-request.
(Ref:http://www.exforsys.com/images/vbnet/sourecode/J2EE/2-Servlet%20Basics/servlet-lifecycle.jpg)

The Thread-per-request model has its own share of advantages and disadvantages. It’s pretty easy to work with this model compared to creating processes per request. But creating multiple threads can get really complicated when the number of requests increase. It carries a significant memory cost and results in an overhead. If your servlet performs a time consuming job, it’s going to hold other threads(requests) in waiting. In other words an expensive operation blocks I/O. J2SE 1.4 introduced a new I/O API called NIO. NIO is also popularly referred to as Non-blocking I/O. The servlet 3.0 specification came up with NIO concepts incorporated. So we could now create non-blocking or asynchronous web applications with the servlets. The Tomcat7 and Jetty8 are popular servlet containers that support servlet 3.0. However, you still have backward compatibility issues.
Servlets over the years, have become heavyweight, thanks to several layers in the name of frameworks built around them. You have Struts, JSF etc. adding extra flab around it. So debugging, building a simple RESTful style URLs etc. are painful.
On the other hand, with servlets and containers evolving, there has been a steady growth of new solutions like Node JS. So here’s a set of questions we would like to ask.

  • Isn’t there a simple way of developing high productive, non-blocking, asynchronous web applications on the JVM without having to be dependent on servlets?
  • Should we still be dependent on a heavyweight container to manage the lifecycle etc.?
  • Wouldn’t be good if we can write concise code and develop web applications on the JVM?
  • Can we get rid of the heavyweight JEE stack?

Enter Play framework.

Play Framework

Play framework (http://www.playframework.com) is an open source web framework, lead by Typesafe(https://typesafe.com/). It is used for building asynchronous, high-productive web applications in Java and Scala. To quote the official site, “Play is based on a lightweight, stateless, web-friendly architecture. Built on Akka, Play provides predictable and minimal resource consumption (CPU, memory, threads) for highly-scalable applications.”

Play is implemented to follow asynchronous and non-blocking styles. Play is built on top of Netty server(http://netty.io) as shown in Figure 2.0. Netty uses NIO2 API for non-blocking IO. It is event-based and not threaded like the servlet containers. It makes concurrent requests a breeze. Play framework integrates very well with Akka API.
Play framework was originally written in Java, then moved to Scala. It’s written in Rails style, with high developer productivity in mind. If you need to build applications that have to scale, Play is a fantastic choice.
02
Figure 2.0: Play Architecture (Ref: Play with Scala, Manning)

Play framework with Scala brings the functional style to web development. So the API is expressive and concise. It has a full-fledged eco-system with builds, test specs, maven repositories etc. The current stable version of Play Framework is 2.x.

Components of Play

Play framework bascially follows the MVC(Model-View-Controller) pattern. The application is segregated into Models, Views and Controllers. Figure 3.0 shows the architecture of a Play application.
03

Figure 3.0: Components of Play (Ref:https://www.playframework.com/documentation/1.3.x/main)

The heart of a Play Application is the Controller. The Controller class contains collection of Action methods. Each Action method accepts a request and returns a result. The result contains information about the View pages. The View pages are html files with a special template syntax to access Scala objects and write some Scala code. The request from the client is routed to the controller’s action methods using routes. The models are companion objects that are used to access the persistent storage. The HTTP requests are processed asynchronously.
The components of a Play application are very similar to the Rails/Grails application. We’ll talk more about it in the next post.

Share this on: Mixx Delicious Digg Facebook Twitter
Shortlink

SAP Hana from the eyes of an application developer

By Prabhu Sunderaraman on May 3, 2015 in Cloud

Inspite of working with several open source technologies, .NET stack, mobile stack for several years, SAP had been a mysterious black box for a long time. Five years back I finally got a chance to work in a number of applications using SAP at the backend. I got introduced to the SAP world; ABAP, BAPI, ECC, EBP, R3, BI, BW, DSO etc., These terms and jargons can drive you nuts if you are from the Java/.NET/RoR world.

Last week I visited SAP HQ in Germany for understanding the future of SAP, Hana on the Cloud. HCP( or Hana Cloud Platform) is the latest(!!!) offering from SAP. Sensing the future being cloud, they have unified all their services and created a complete stack on the cloud.

Now, what’s interesting to the whole bunch of audience in the programming, non-SAP world is it’s easy to get into SAP Hana now. They talk our terms; Here’s is some of the things that I as an application developer have understood about SAP.

  • ABAP is history. It’s going to be (or already) a bad news for lot of ABAP developers. SAP Hana is moving it out slowly. Though the core libraries are still ABAP, it’s imperative for the guys to move to Java world.
  • No support for .NET. That’s really not a surprise.
  • You can develop Java and HTML5(with JS) applications and deploy it in HCP.
  • RoR, Node JS and Scala support is on the way
  • Monolithic application development is slowly fading away in the cloud. It’s time for multiple little services floating in the cloud.
  • The In-Memory Column database Hana DB, brings in the speed for analytics. This is my favorite.
  • IoT (Internet of Things) seems to be the fancy kid of SAP world. The roadmap has a number of things moving towards bringing in support for IoT
  • A number of functional business-oriented applications like SuccessFactors, Ariba, C4C, Concur etc., have been acquired by SAP and moved to the cloud.
  • SAP applications on the mobile with devices management mechanisms is a key player.
  • There’s no support for elasticity like AWS
  • It’s bloody expensive right now!!!

We need to wait and see what lies ahead of SAP Hana on the Cloud. But definitely interesting for an application developer like me.

Of all the snaps, I clicked during my visit, the following was the most interesting :) :)
IMG_20150429_202433894_HDR

Share this on: Mixx Delicious Digg Facebook Twitter
Shortlink

Microservices Architecture Workshop

By Prabhu Sunderaraman on March 26, 2015 in Languages, NodeJS, Tools

Ever since I started following the Twitter engineering stories, I had developed a great interest in Microservices Architecture. Last Tuesday, I attended an one day workshop on Microservices Architecture, in Bangalore, as a part of the Agile India conference. Fred George, who I have interviewed for the May issue of the magazine, conducted the workshop. Fred, has a fascinating track record, which you can read in the May issue.

The workshop started with a brief introduction of the architecture. The Netflix, LinkedIn stories were discussed and Fred talked about his experience of working in a project where every 3 1/2 minutes the code was being deployed to production. In this architecture the entire application is split into tiny self-contained, self-monitoring, replaceable services. Each service has its own data store. The time taken to make changes to the services is very very less. And since the whole application is broken down into tiny pieces, you can manage them more efficiently. What was very interesting to me, was the facility to use of multiple technologies/languages in this architecture.

All the services talk to each other in a completely decoupled manner using message bus. LinkedIn apparently has open-sourced its bus called Kafka. Netflix has hundreds of services implemented in Java. With popular support from cloud providers like Amazon, it’s very easy to set up microservices and get them running as quick as possible. The microservices architecture, blends well with the Agile principles. You can experiment a new idea in your project and get it up and running asap.

I then paired up with Dhaval and implemented a simple application. We chose NodeJS and Java. We had services written in both interacting with each other using RabbitMQ.

Overall it was fun. I have jotted down some notes in .adoc format. I will share the nodes and the code written in Node JS in my Github soon. Microservices is so much productivity; but like any new stuff it’s going to take some time to get into the developer’s and the bosses’ minds.

Share this on: Mixx Delicious Digg Facebook Twitter
« Previous 1 … 24 25 26 … 64 Next »

Youtube Channel


Categories

  • JavaScript (48)
    • RequireJS (5)
  • Go (44)
  • Golang (44)
  • Ext JS (23)
  • Spring (22)
  • Mobile (21)
  • Scala (20)
    • Play (3)
  • Uncategorized (19)
  • Video Sessions (18)
  • GoG (17)
  • Sencha Touch (16)
  • jQuery (14)
  • Languages (13)
  • Java 8 (12)
  • React JS (11)
  • Kotlin (11)
  • HealthyCodeMagazine (9)
  • Video (9)
  • Objective-C (8)
  • NoSQL (8)
  • Android (7)
  • MongoDB (7)
  • GWT (6)
  • Tools (6)
  • HTML 5 (5)
  • Cloud (5)
  • General (5)
  • Micro services (5)
  • Java (5)
  • Books (4)
  • AWS (4)
  • Software Architecture (4)
  • .NET (3)
  • Elixir (3)
  • Docker (3)
  • Reactive (3)
  • NodeJS (2)
  • RoR (2)
  • Backbone (1)
  • AngularJS (1)

Archives

  • 2020 (49)
  • 2019 (7)
  • 2018 (34)
  • 2017 (15)
  • 2016 (7)
  • 2015 (18)
  • 2014 (31)
  • 2013 (55)
  • 2012 (100)

Search

Subscribe


Copyright © 2025 Prabhu Sunderaraman.

Powered by WordPress and News.