Shortlink

Background threads in JavaScript – II

In the earlier post, we discussed WebWorkers in HTML 5 that can be used to execute JavaScript code in the background. Let’s discuss the use of a WebWorker in this post.

You can create an instance of Worker class by passing the js file as an argument. The code present in the JS file will run as the worker thread. The worker thread and the UI thread can communicate with each other through messages. ie., To pass message you will use postMessage function and to receive message you can use onmessage callback function.

Let’s create a simple example of the worker thread that deals with prime numbers. Wikipedia on WebWorker too has the prime numbers example but let’s do it a bit differently.
Let’s create a text box where you enter a number say 100 and press the button. The number 100 will be posted to the worker thread. The worker code will calculate the list of prime numbers within 100 and pass them to the UI thread one by one. The UI thread will display them in a header element.

The prime number code is created in PrimeNumber.js file. The code is shown below.

//PrimeNumber.js
self.onmessage = function(e){
	var limit = e.data;//100
        self.postMessage("1,2");//1 and 2 are primes
	for(var num=3;num<limit;num+=2){
		var prime = true;
		for(var j=3;j<(num/2);j+=2){
			if(num%j == 0) 
				prime = false;
		}
		if(prime)
			self.postMessage(num);
	}
	self.postMessage("Over");
};

The onmessage function receives the limit from the UI thread and starts computing the number of prime numbers. Every prime number is passed on to the UI thread using postMessage function. When it’s done computing, a message “Over” a passed on to the UI thread.

The html file PrimeNumber.html that consumes the worker is shown below.

<!DOCTYPE html>
<html>
	<head>
		<script src="http://code.jquery.com/jquery-1.7.2.min.js"></script>
		<script>
			var primeNumberWorker;
		
			$().ready(function(){
				if(window.Worker){
					$("#findPrimesBtn").on("click",findPrimes);
					primeNumberWorker = new Worker("PrimeNumber.js");		
					primeNumberWorker.onmessage = function(e){
					if(e.data == "Over")
					{
						$("#limit").removeAttr("disabled");
				$("#findPrimesBtn").removeAttr("disabled");
					}
	else{
					var data = $("#infoH2").text();
					data += e.data + ", ";
					$("#infoH2").text(data); 				}};
			  }
			else{
				alert("Worker is not supported");
			}
			});
			function findPrimes(){
				$("#infoH2").html("");
				$("#limit").attr("disabled","disabled");
				$(this).attr("disabled","disabled");
				primeNumberWorker.postMessage(parseInt($("#limit").val()));
			}
		</script>
	</head>
	<body>
		Limit <input type="text" id="limit">
		<input type="button" value="Find Primes" id="findPrimesBtn">
		<h2 id="infoH2"></h2>
	</body>
</html>

In the code above, we create a Worker object by passing the PrimeNumber.js file as the argument. When the findPrimes button is clicked we post the number as a message to the worker thread. The output from the worker thread is displayed in the infoH2 header tag.

You can execute this page in FireFox 11.0. If you notice, all that we have used is onmessage callback and postMessage methods. The problem executing this with Firefox is it does consume a lot of memory as Webworkers are pretty memory intensive.

Shortlink

Background threads in JavaScript

One of the prominent features in HTML 5 is WebWorkers. WebWorkers provide the facility to run your JavaScript code in a background thread. All the code that we write in JS are executed in the UI thread. Hence performing a long processing task in JavaScript tends to block the UI and make it unresponsive.

WebWorker introduced in HTML 5, can be used to execute your JavaScript code in the background without obstructing the UI thread. Code running in Worker thread does not have access to the DOM, data storage areas, but has access to the other core JavaScript API, can perform AJAX calls etc.,

In one of my client assignments that involved developing mobile web application, WebWorker was used to load large amount of data during the initial page load. The code that ran as a worker thread performed multiple AJAX calls and loaded the data and gave it to the UI thread which stored it in Web Sql database and consumed it whenever required. When the Worker thread was running in the background, the UI thread was busy constructing the layout components like accordion, lists etc.,

WebWorker has support from the latest versions of many browsers. It has to be used judiciously as it supposedly consumes a lot of memory.

In the next few posts let’s discuss the use of WebWorker API with simple examples.

Shortlink

Plain vanilla drag n drop in Ext JS4

The drag and drop examples in Ext JS4 look overly complicated that one keeps wondering if drag and drop implementation is very difficult. It’s actually pretty simple.

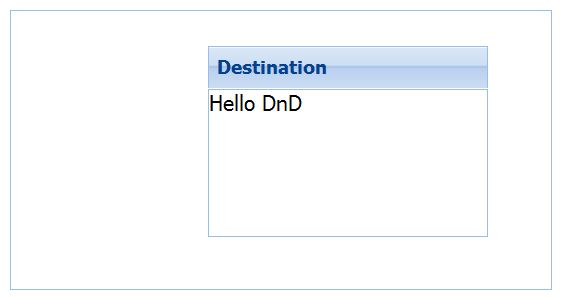
Let’s drag a simple label into a panel as shown below.

Before DnD

After DnD

Three basic steps that you need to follow for this.
1) Define the component that can be dragged using DragZone.
2) Define the component that acts as a container where items will be dropped, using DropZone.
3) Using the data passed from the dragged item to the dropped container, you decide what you want to do.

In our example let’s configure the Label as the DragZone object and the panel as the DropZone object. The configuration of the DragZone and DropZone is done on the underlying DOM element of the label and panel. For this purpose, you will configure this in the render event of these two components.

//Label configured as DragZone
var lbl = {
	       	xtype : "label",
	       	text : "Hello DnD",
	       	id : "lbl",
	       	padding : 5,
	       	margin : 15,
		listeners : {
		       		render : function(v){
		       			lbl.dragZone = Ext.create("Ext.dd.DragZone",v.getEl(),{
		      				getDragData : function(e){
		       				   var sourceEl = e.getTarget();
			        		   var clonedSourceEl = sourceEl.cloneNode(true);
			        		   return lbl.dragData = {
			        		           ddel: clonedSourceEl,//mandatory
			        		           sourceEl: sourceEl
			        		   }
			        		}
			        	});
			        }
			   }     
};

The render event of the label configures it as the DragZone. In the getDragData function you merely clone the label element and pass it to the drop zone.
“ddel” is a mandatory element that contains the clone and other extra information is passed as data to the drop zone. The panel which is the drop zone will consume this data and react accordingly.

//Panel configured as DropZone
var pnl = {
	title : "Destination",
	padding : 20,
	height : 150,
	width : 200,
	listeners : {
		render : function(v){
		    pnl.dropZone = Ext.create("Ext.dd.DropZone",v.getEl(),{
				getTargetFromEvent: function(e) {
			            return e.getTarget();
			        },
				onNodeDrop : function(target,dd,e,data){
			            targetEl = Ext.get(target);
				    targetEl.update(data.sourceEl.innerHTML);
				    data.sourceEl.innerHTML = "";
				},
			});
		}
	}        
};

The panel is configured as the drop zone above. The onNodeDrop function gets the data that is received from the drag zone and updates the panel. The main Ext.application code is shown below.

Ext.application(
{
	launch : function(){
	    Ext.create("Ext.panel.Panel",{
			layout : "hbox",
			padding : 20,
			height : 200,
			width : 350,
			items : [
			          lbl,pnl
			        ],
			renderTo : Ext.getBody()        
		});
	}
});
Shortlink

Local storage with Ext JS 4

Local storage in HTML 5 lets you store data in the browser’s memory. Unlike cookies they don’t travel with the client request. Mobile applications make use of this facility extensively. Playing with local storage in the raw format using JavaScript can get tedious if the data that you’re trying to store has a complex structure. You may have to put in effort to format the data before and after storing, work with the conversion mechanisms etc.,

Ext JS4’s API makes working with local storage absolute breeze due to the serialization and deserialization facilities it provides. You can create a complex object and save it in local storage, retrieve it and operate on it without any hassles or extra effort.

Let’s define a Model called User with id, username and password fields. The proxy of this Model will point to localstorage. You have to specify an unique identifier to the proxy, for it identify the data in local storage. Let’s define the identifier as ‘credentials’.

Ext.define("User",{
		extend : "Ext.data.Model",
		fields : [
		          	"id","username","password"
		         ],
		proxy : {
				type : "localstorage",
				id : "credentials"
			}         
}); 

Let’s create an instance of the User Model and save it. We’ll implement this conditionally ie., save it only when the credentials are not available, else display the user name.

Ext.application({
		launch : function(){
		  User.load(101,{
			   callback: function(record){
					if(record.get("id") != 101){
					var user1 = Ext.create("User",{id:101,username:"admin",password:"admin"});
					user1.save(); 
					alert("User created successfully");		
				}
				else{
					alert("User name : " + record.get("username"))
				}
			}
		  });
		}
	     });

The static method load and the instance method save are used in the code above. The save method automatically serializes the user object and saves it. The load deserializes the data and gives it to you as the Model instance. The snapshot of the local storage in Google chrome is shown below.

The local storage section has a key “credentials” that lists the id of all the objects stored. You will also have the individual objects stored with the key format roughly equivalent to “credentials-idNumber”.

Shortlink

A DSL query in Groovy

DSL, Domain Specific Languages is a fascinating subject. Reams of articles have been written on this topic. Groovy provides a fluent syntax to create DSLs. Let’s use the meta-programming and closure concepts and build a simple DSL.

Say you have a database ‘personsdb‘ in mysql with a table ‘persons‘. The table has three columns id, name and age. You want to display name and age of all the persons using this syntax in Groovy.

display "name,age" from "persons

This is a short form for writing

display("name,age").from("persons")

The display method will construct a select query. The from method will add the “from” clause in the query and execute it in the database.

String.metaClass.from = {table ->
	String query =  "${delegate} from ${table}"
	def sql = Sql.newInstance("jdbc:mysql://localhost/personsdb", "username",
                      "password", "com.mysql.jdbc.Driver")
	sql.eachRow(query) {
		println "${it.name}, ${it.age}" 
	}
}
def display(columns){
	String sql = "select "
	columns.split(",").each {
		sql += it + ","
	}
	sql = sql[0..-2]
	return sql
}

display method returns a String. The “from” method is injected into the String class using meta-programming. The from methods constructs a complete SQL select query and executes it in the personsdb database. The delegate keyword is used to access the invoking object.

You can exploit the capabilities of the Groovy language and build your own DSLs that look like plain English text.