Shortlink

Mobile development and Node.js

In an earlier post on Node.js, you saw how it can really improve the productivity by using it’s standalone JavaScript runtime to execute the scripts. The Node.js home page provides a six liner example of creating a simple Web server that can process HTTP requests, using it’s API. The piece of code is shown below.

var http = require('http');
http.createServer(function (req, res) {
  res.writeHead(200, {'Content-Type': 'text/plain'});
  res.end('Hello World');
}).listen(1337, '127.0.0.1');
console.log('Server running at http://127.0.0.1:1337/');

Execute this script and you have a web server up and running in few seconds.

This ready made, extremely light-weight web server has been very useful while developing and testing mobile applications. Number of times, you have to communicate with the server and exchange data, from a mobile device or an Android/iOS device simulator. Setting up a server like tomcat/IIS just for this purpose has been really painful and a tedious process.
Node.js has made this job, easy. Creating a web server, tweaking it to behave the way you want, make it deliver the response that your application needs, all these have become very agile.

I have started using this Node.js server for playing with new stuff and it has made learning more enjoyable as you can get to the point faster than before.
Shortlink

Interesting analogy for retain and release

Understanding retain and release keywords in Objective-C 2.0 is a challenge. I came across an interesting analogy on retain and release, by Aaron Hillegass. His analogy has been quoted in one of the topic threads at StackOverflow. The analogy compares removing and attaching a leash on dog when “release” and “retain” are called.

The extract goes like this…

Think of the object as a dog. You need a leash for a dog to keep it from running away and disappearing, right?
Now, think of a retain as a leash. Every time you call retain, you add a leash to the dog’s collar. You are saying, “I want this dog to stick around.” Your hold on the leash insures that the dog will stay until you are done with it.
Think of a release as removing one leash from the dog’s collar. When all the leashes are removed, the dog can run away. There’s no guarantee that the dog will be around any longer.
Now, say you call retain and put a leash on the dog. I need the dog, too, so I walk along with you and start training him. When you are done with the dog, you call release and remove your leash. There are no more leashes and the dog runs away, even though I was still training him!
If, instead, I call retain on the dog before I start training him, I have a second leash on the collar. When you call release and remove your leash, I still have one and the dog can’t go away just yet.
Different objects can “own” the dog by calling retain and putting another leash on its collar. Each object is making sure that the dog doesn’t go away until it is done with it. The dog can’t go away until all of the leashes have been removed.
Autorelease pools get more complicated, but simplistically you can think of calling autorelease as handing your leash to a trainer. You don’t need the dog anymore, but you haven’t removed your leash right away. The trainer will take the leash off later; there is still no guarantee that the dog will be around when you need him.

You can read this extract here. Pretty enjoyable.

Shortlink

Plain Old Objective-C class – IV

The equivalent of interfaces in Java and C# in Objective-C are the Protocols and not the @interface that you use to declare the methods and variables. A protocol is defined using @protocol directive. It can have mandatory and optional members. A class needs to implement the mandatory methods declared in the protocol, if the “interface” of the class follows it. A simple protocol Shape with area and draw methods is shown below.


@protocol Shape <NSObject>
    @required
    -(NSInteger) area;

    @optional
    -(void) draw;
@end

As you can Shape is a protocol with area and draw methods. Shape protocol itself conforms to NSObject protocol.

Let’s create an interface Circle that uses the Shape protocol as shown below.

#import "Shape.h"

@interface Circle : NSObject<Shape> {
    NSInteger radius;
}
@property NSInteger radius;
@end

Circle interface inherits NSObject and follows the Shape protocol. The protocol list is specified within the angular brackets < >. The Circle implementation is shown below

#import "Circle.h"

@implementation Circle
    @synthesize radius;

-(NSInteger)area{
    return 3.14 * radius * radius;
}

//optional
-(void)draw{
    NSLog(@"Drawing circle");
}
@end

Circle implementation needs to implement the area method, though the draw method is optional. The main function is shown below.

int main (int argc, const char * argv[])
{
    Circle *circle = [Circle alloc];
    circle.radius = 22;
    NSLog(@"Area: %ld",[circle area]);
   if([circle conformsToProtocol:@protocol(Shape)])
       NSLog(@"Circle conforms to Shape protocol");
}

We have created a Circle object and also used the conformsToProtocol method that checks if circle object conforms to Shape protocol. It’s easier to understand protocols if you have worked with interfaces in Java/.NET languages.

Shortlink

Improved productivity with Node.js

Writing raw JavaScript code and running it in a browser to test it has always been a non-agile technique. You have to unneccesarily create a HTML page, include the JavaScript code in it and run the HTML page in a browser to test if the code works fine. Tedious!!!
The browser invokes the JavaScript interpreter/runtime to execute the code. It will be useful if you can run your JS code directly using the JavaScript interpreter just like you would work with other programming languages.
Welcome Node.js. Node.js is a standalone JavaScript interpreter that is built using Google Chrome’s V8 JavaScript engine. It’s not only a JavaScript engine but also a comprehensive API for building powerful applications using JavaScript.
Let’s discuss the standalone interpreter feature that improves our productivity while working with JavaScript. You can download and install node.js from here. After installation you can type in the command “node” in the command prompt and pass in the js file that you want to execute.
Given below are the screen shots for creating a sample JS code and running it in an agile manner.
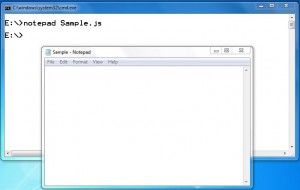
You can open the command prompt and create a JS file say Sample.js using notepad.


Let’s type in some JS code and run it using node command.

Writing JavaScript code without mixing HTML fragments, writing unit tests, executing them etc., is more light-weight now, thanks to Node.js.

Shortlink

Plain Old Objective-C Class – III

Methods in Objective-C support named parameters. You can specify the name of the parameter and assign value to it while invoking the method.
Let’s discuss this with a class Calculator that has a method add with three parameters num1, num2 and num3.

//Calculator.h
@interface Calculator : NSObject {
}
-(int)add:(int)num1 : (int)num2 : (int)num3;
@end

The add method accepts three parameters num1 an (int), num2 an (int) and num3 an (int). The parameter list is separated by colon (:). Let’s implement this method in Calculator.m and invoke it in the main function

//Calculator.m
@implementation Calculator
-(int) add:(int)num1 : (int)num2 : (int)num3{
    return num1+num2+num3;
}
@end

//main.m
int main(int argc, const char * argv[]){
 Calculator *calc = [Calculator alloc];
 int sum = [calc add:12 :12 :12];
}

In the line [calc add:12 :12 :12] you’re invoking add method by passing 12,12 and 12 as arguments. If you have a method that accepts 4-5 parameters method invocation code will not be readable at all. It’ll be better if you can specify the parameter name and pass a value to it, while invoking the method.
Let’s modify the add method to accept a name for the second and third parameters

//Calculator.h
@interface Calculator : NSObject { 
}
-(int)add:(int)num1  number2:(int)num2 number3:(int)num3;
@end

//Calculator.m
@implementation Calculator
-(int) add:(int)num1 number2:(int)num2 number3:(int)num3{
    return num1+num2+num3;
}
@end

We have introduced names for the second and third parameters number2 and number3. The syntax can be confusing to begin with. The method parameters are delimited by a colon(:) and you add a name before every colon. This is not the case for the first parameter of a method, though. You can invoke the add method in the main function as shown below.

int main (int argc, const char * argv[])
{
    Calculator *calc = [Calculator alloc];
    int sum = [calc add:12 number2:12 number3:12];
}

The add method call is a lot more readable now.
Understanding the named parameters concept in Objective-C is very essential to comfortably work with iOS applications.